Last updated: June 2019

Overview
This page provides instructions for using a Windows laptop to setup a Cisco 819W router for use with Cisco dCloud Enterprise Networking and Security demonstrations. Please follow the steps in this document completely to ensure that your 819W router is setup and configured for Cisco dCloud.
Unbox and Install
- Review the installation guide: http://www.cisco.com/c/en/us/td/docs/routers/access/800/hardware/installation/guide/800HIG.pdf.
- Unbox all components. Connect the WiFi 2.4/5 Ghz Dipole External antennas and power cord.
Connect to the Console Port
DO NOT connect the router to an active Internet connection until after the Cisco dCloud configuration is loaded onto the router. Cisco recommends that you connect directly to your router via the console port. Telnet is not recommended. If issues arise during the upgrade, it may be necessary for you to physically power cycle the router. Moreover, the Telnet connection is lost while the router reboots during the upgrade procedure.
- Connect the flat, blue rolled cable (included in the box) to the port on the router labeled CONSOLE.
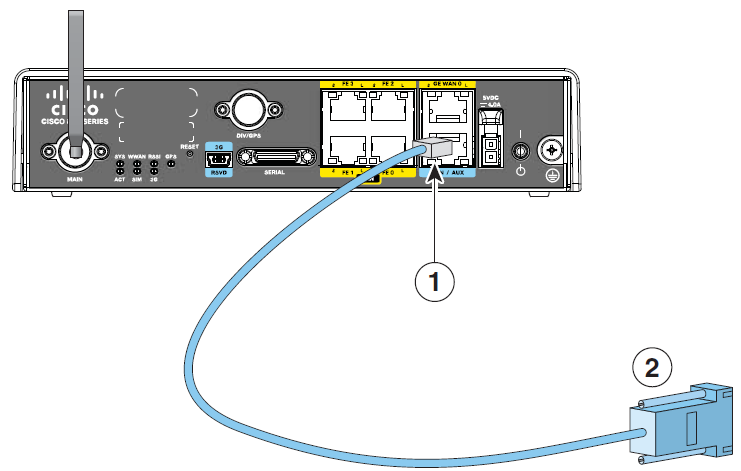
- Connect the other end of the rolled cable to one of the COM ports of your computer.
Most modern computers will require a USB to serial adapter that allows you to connect the rollover cable to a USB port on your computer
- Power on the router.
Terminal Emulation - Windows
Terminal emulation software is used to connect the computer to the router. There are many terminal emulation software programs available, however, we will use Tera Term in the steps below.
- From the Windows computer, download and install Tera Term.
- Launch Tera Term.
- From the New Connection window, select Serial and then select the Port on your computer that is connected to the router.
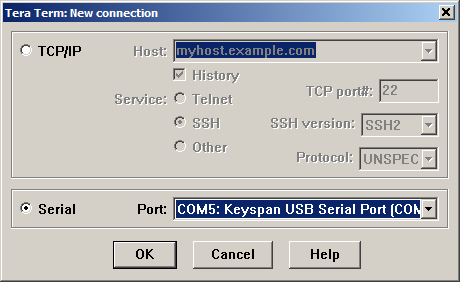
- Click OK.
- Press the Enter key and verify that the router responds.
Log In to the Router
- From the terminal emulation program, press the Enter key. You will be prompted for a username and a password. A new router with the factory default information is configured with the following:
- Username: cisco
- Password: Cisco
- Enter privileged EXEC mode using the enable command.
- Router>enable
- Router#
Which Cisco IOS Release Is Running on My Router Now?
- To determine the Cisco IOS release that is currently running on your router, and the filename of the system image, enter the show version command in user EXEC or privileged EXEC mode. The IOs version will be listed in the first line of output.
Cisco IOS Software, C800 Software (C800-UNIVERSALK9-M), Version 15.3(2)T, RELEASE SOFTWARE (fc3)
2. Verify that your IOS version is the recommended version for our router model. [Show Me How]
My System Image is Not Correct. Where Do I Download the System Image?
- To download a system image, you must have a Cisco.com account. Open a web browser on your computer and go to www.cisco.com. Login with your Cisco.com credentials.
- If you do not have an account or have forgotten your username or password, click Cancel at the login dialog box, and follow the instructions that appear.
- Download the recommended IOS for your router. From the home page, select Support then Downloads. In the search field, type the model of your router.
- Load the correct software image onto the router. [Show Me How]
Add Router to dCloud and Download Files for Configuration
- Add your router to dCloud and then download the files needed to configure your router using the Console. [Show Me How]
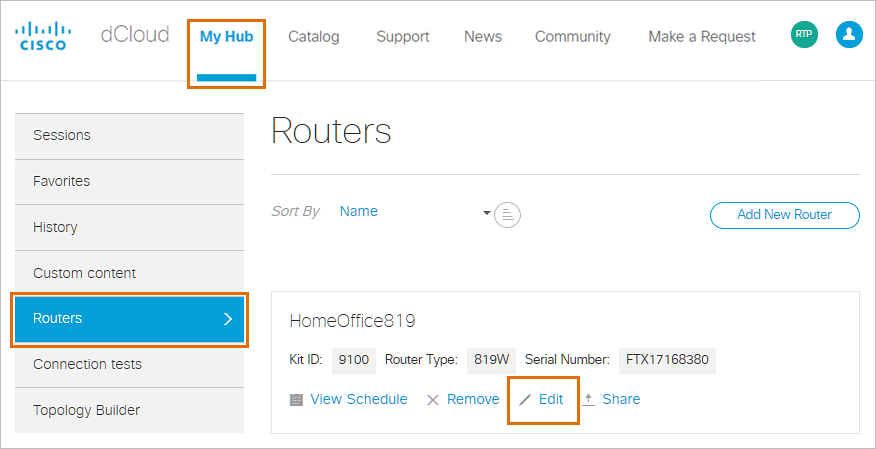
- Each router you register with Cisco dCloud is located in My Hub > Routers.
- If you register your router but do not configure it, you can download the customized router configuration files at any time, by clicking Edit and following the wizard.
Load the Cisco dCloud Customized Configuration onto the Router
- Locate the downloaded .zip configuration file, and then extract the file to a convenient directory on your computer.
- From the TeraTerm application on your computer, ensure that you are logged in to the router and see the privileged EXEC mode prompt.
If your previous login session has timed out, it may be necessary to reboot the router in order to login with the default username and password again.
- From privileged EXEC mode, enter the following commands.
Router# copy xmodem: flash: **** WARNING **** x/ymodem is a slow transfer protocol limited to the current speed settings of the auxiliary/console ports. The use of the auxiliary port for this download is strongly recommended. During the course of the download no exec input/output will be available. ---- ******* ---- Proceed? [confirm] <Enter> Source filename []? config.txt (Change to the name of the file you downloaded previously) Destination filename [config.txt]? backup %Warning:There is a file already existing with this name Use crc block checksumming? [confirm] N Max Retry Count [10]: <Enter> Perform image validation checks? [confirm] N Xmodem download using simple checksumming with NO image validation Continue? [confirm] <Enter> Ready to receive file...........
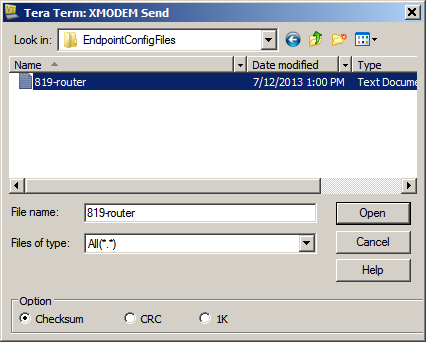
- The router is now ready to receive the customized configuration previously downloaded. Within TeraTerm select File > Transfer > XMODEM > Send.
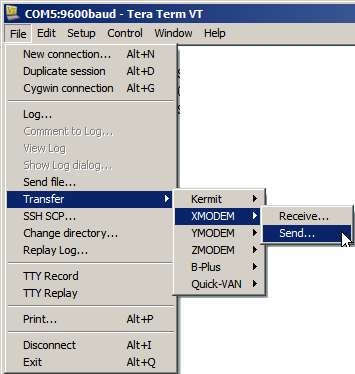
- Find the configuration file on your computer and select Open. This will start the customized file transfer to the router. If this does not complete successfully repeat from Step 1.
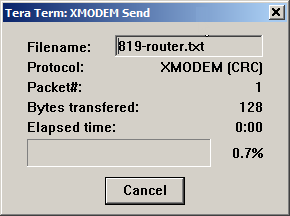
- Once the customized configuration file is copied to the router flash, copy the backup file from flash to startup-config as shown below.
Router#copy flash:backup startup-config Destination filename [startup-config]? <Enter> [OK] 12160 bytes copied in 2.704 secs (4497 bytes/sec)
- Reboot the router to load the customized configuration into running configuration for the dCloud system.
Router#reload Embedded AP will also be reloaded.https://dcloud-cms.cisco.com/wp-admin/post.php?post=886&action=edit Do you want to save the configuration of the AP? [yes/no]:N Proceed with reload? [confirm] <Enter>
Verify Access Point Configuration with the WLC
Now that the AP has been upgraded to the correct version, it can be configured for use with Cisco dCloud.
- From the dCloud UI, open My Hub - Routers.
- Locate your session and click View.
- Open Details > Session Details.
- Scroll to the AnyConnect Credentials section. Make note of the Users and Password information as this will be needed to access the Wireless Controller
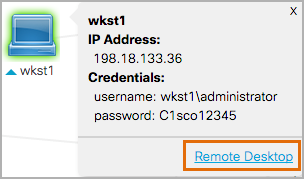
- In the Topology, click wkst1 and then click Remote Desktop to access the demonstration workstation.
- Login as administrator/C1sco12345.
You can also access the WLC using a laptop connected behind the router, or a laptop connected to the demonstration via AnyConnect VPN. [Show Me How]
- From a web browser on wkst1, navigate to the Wireless Controller located at https://wlc1.dcloud.cisco.com.
- Login using the unique session credentials found in the AnyConnect Credentials, mentioned in step 4.
- Navigate to Wireless > All Aps and select your AP.
To determine which AP in the list is your AP, locate the AP with the MAC address that matches the AP prompt.
- Change your AP to the correct country.
- Select the Advanced tab and in the Country Code drop-down select your country
- Click Apply.
- Enable your AP.
- Select the General tab. Next to Admin Status select Enable.
- Click Apply.
Once the AP is provisioned using the steps above, it should not require additional configuration in future sessions. To use the AP in future sessions, add the router during scheduling. When the session becomes active, the router will establish the VPN tunnel and the AP will connect to the controller for your session.